
Printmaking art project – fourth grade students carved designs into styrofoam using a pencil, then repeated it four times to create radial symmetry.
Supplies:
- 4 inch squares of paper
- 4 inch styrofoam squares
- Painter’s Tape
- 8 inch squares of neon paper
- Spray bottles
- Plates or mirrors for rolling out ink
- Brayers
- Black printmaking ink
Downloadable PowerPoint: 4th Printmaking

My favorite part of teaching printmaking is watching students break down the process and become comfortable with an art form they have never tried before. When I introduce any printmaking project, the kids are in awe of how magical it seems. I love seeing them take ownership of the process and become confident in something new.

Printmaking supplies can be expensive, so I’ve learned where I can cut costs and where I need to buy the good stuff. When I can afford to do lino cuts, I jump at the chance. They are excellent for teaching positive and negative space. Doing Styrofoam prints is a little less glamorous, but I would rather use it than cut printmaking from my curriculum entirely. Styrofoam is also great for younger kiddos who might not be ready to use sharp carving tools.

Even the large packs of Styrofoam can get expensive, so I have been searching for a project that uses small pieces, but still had a big impact. When I saw a project on Art. Paper. Scissors. Glue! that blended printmaking and radial symmetry, I was intrigued. After all, it capitalizes on the inherent benefit of doing printmaking – create an image once and then use it repeatedly. I always do this lesson with my 4th graders right after Notans, so they still have the concept of symmetry fresh in their minds. With high school and middle school students, I introduced the idea of radial symmetry by linking it to the radius of a circle. I quickly realized that 4th graders haven’t covered that yet, so I simplified my definition to symmetry that goes around in a circle.

The sketching step for this is pretty quick. I used visuals on a PowerPoint and did a demonstration to show students how to fold their 4 inch square into a triangle, draw an abstract design and then trace it to the other side. Then I showed them how to tape their sketch onto a 4 inch square of Styrofoam. First, they traced the design on the paper, pressing into the foam. Then, they took the paper off and drew over the design a second time, so they could carve the design into the Styrofoam.

I’ve experimented with several different paper and ink combinations. My favorite, in terms of visual impact and classroom management, is black ink on neon copy paper. It means that every table has the same color ink, which makes our class run so much smoother! But there is still room for color variety with the paper. I have learned that I can cut costs by buying neon copy paper instead of the fancy printmaking paper. But I do not scrimp on ink! I get Speedball block printing ink; I’ve tried using black paint to cut costs and it just does not work well enough. The rule is that a table all raises their hand when they need more ink, and I am the only person who is allowed to squeeze or scoop more onto their plate. That guarantees that their prints don’t get too goopy and our ink lasts as long as possible!

The setup I have at each table is minimal. There is a spray bottle on the mist setting, a plate of ink, and two brayers (one labeled “Ink” and one labeled “No Ink”). Only having two brayers means that there is a little wait time since four students have to share, but having more than four gets very messy very quickly! I’m so glad I invested in a seat of spray bottles for printmaking. Paper that had been lightly misted makes for a much darker, crisper print.
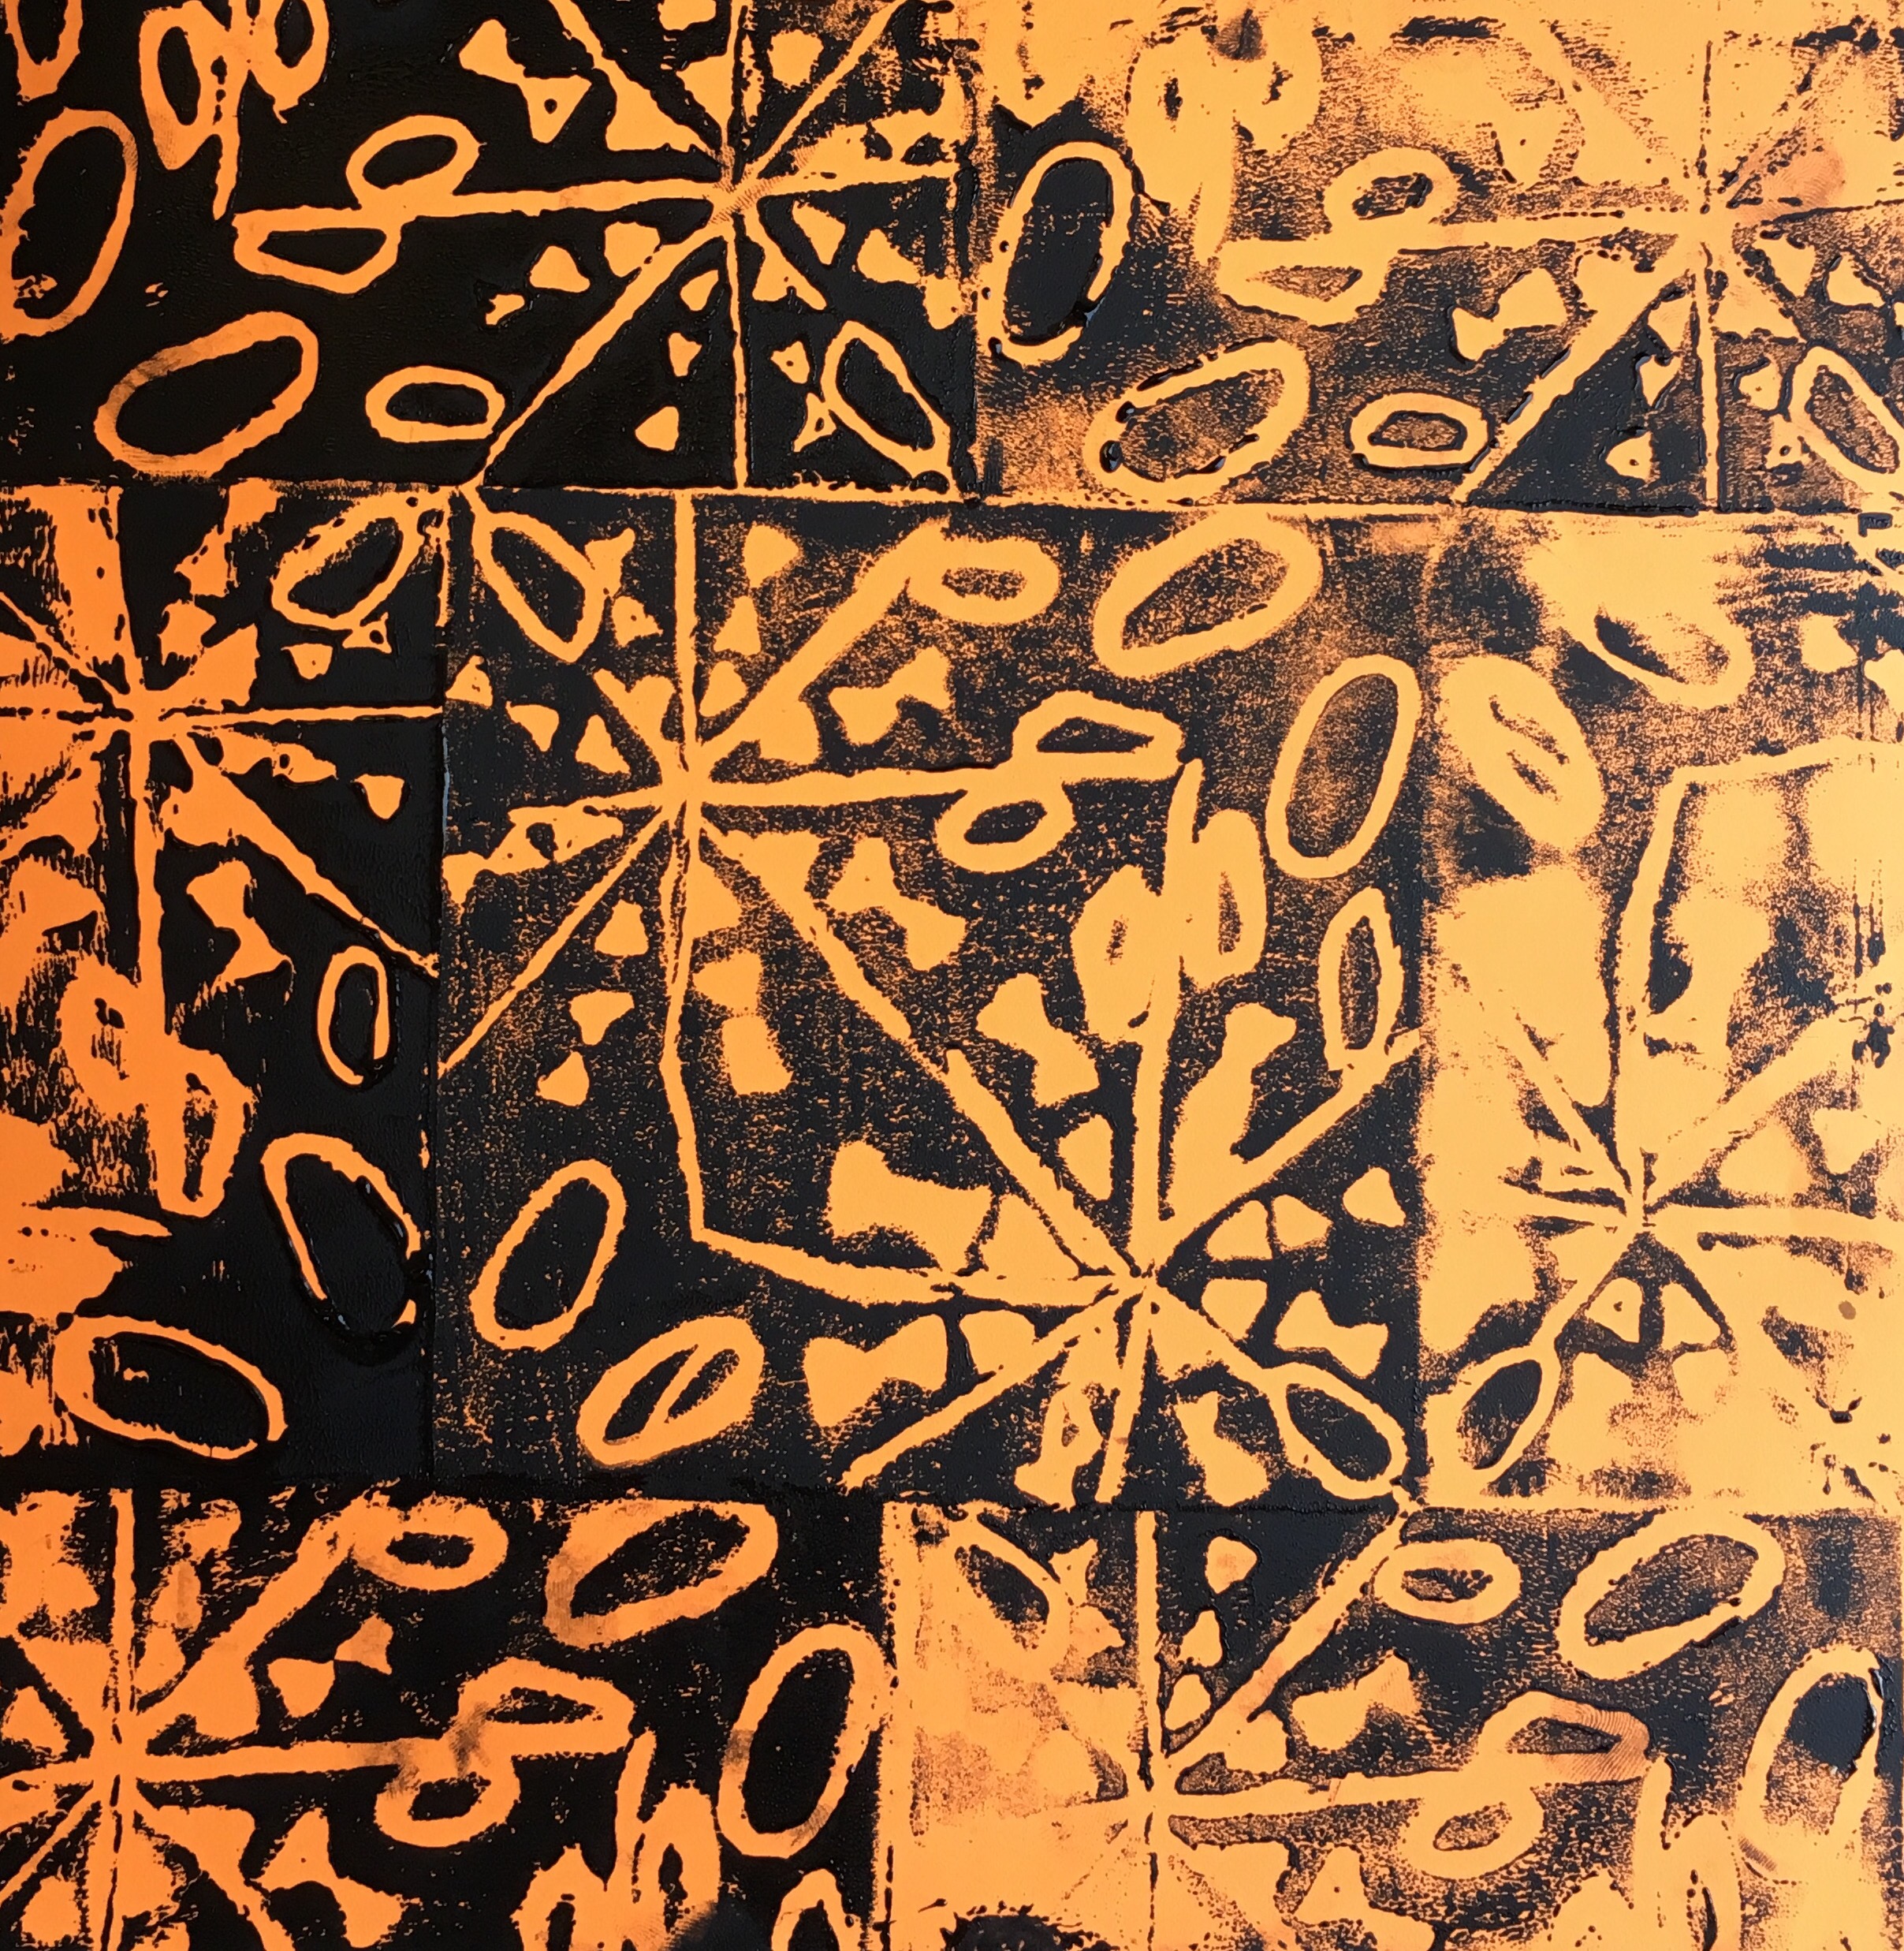
I demonstrate the steps for printmaking and I have the steps listed on the board for students to reference as they work. During the demo, I emphasize the importance of putting a dot in one of the corners on the back of the Styrofoam. Making sure that dot is in the middle for every print is what rotates the image. As they finish, I have students give me their prints so that I can put them onto the drying rack, organized by their table name.

I let students choose how many prints they want to do. They have to make at least two, but they can make as many as five. This range helps reassure students if they get a couple that don’t turn out how they wanted. I also make a point of telling them during the demo that you don’t want your print to look like it was made by a machine, you want it to look like it was made by a human. I didn’t realize how much that statement sunk in for them until I heard them saying it to each other as they were working!

One Comment Add yours