
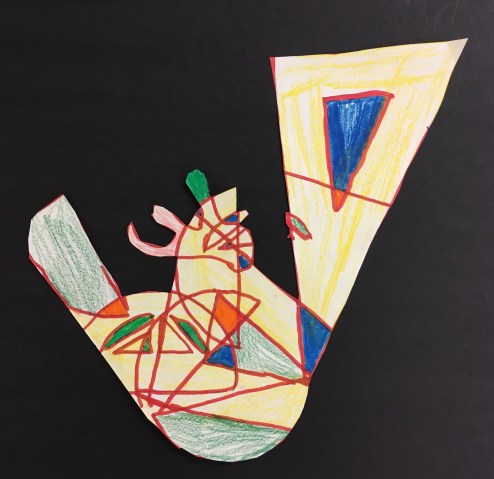
Fourth grade students created drawings using geometric or organic shapes after viewing artwork by Frank Stella.
Art Lesson Videos: Frank Stella Drawings, Part 1 & Frank Stella Drawings, Part 2
Supplies:
- 9″ x 12″ white drawing paper
- Pencils, erasers
- Drawing tools (rulers, protractors, compasses, etc.)
- Colored pencils
- Markers
PowerPoint: Stella Drawings
I was inspired by a post I read on Art is Basic to create a Frank Stella drawing project to start the year with my fourth graders. I loved that it introduced them to new drawing tools and gave them freedom to make artistic choices.

I created video demonstrations to use at the beginning of class for this project. On the first day, my students saw examples of Frank Stella’s artwork – one piece that used geometric shapes and one that used organic shapes. I paused the video and asked the kids, if they were leaning towards using geometric or organic shapes for their artwork. In most classes, overwhelmingly they were planning to use organic shapes.

I played the second part of the video, which was a demonstration of how to use the drawing tools or your imagination to draw shapes. It was interesting that after watching the video, the majority of the class switched ideas and gravitated towards using the tools to create geometric shapes.

Their goal for that first class was to draw their shapes, outline them with marker or colored pencil and cut their paper to a custom shape if they wanted to. We talked about how Frank Stella would create custom canvases that were the same shape as his artwork. I didn’t require that they cut their artwork – they could also choose to leave it as the rectangular paper.

During the second day of class, we started off with another video demo – this time I told them to be listening for the definition of positive and negative space. After they watched, we talked about balancing the positive and negative space by coloring shapes all over the paper.
Giving students the freedom to leave some of their artwork blank was a new approach for me. My mantra has always been “Finish your artwork, finish the background.” For a lot of projects it is important that students think of their background as a part of their work that needs attention. But for this project, leaving negative space felt like a natural fit.

Their goal for the second day was to finish their artwork by coloring the shapes that they wanted to be positive space. It was tricky for me to balance my expectation that they not just color a couple shapes with my desire to give them creative control over their artwork.

There were times that I might have colored a few more shapes, but I could tell that the student had worked hard – so I let them decide when their artwork was finished. There were also times when I knew that a student had only been working for 15 minutes and was in a rush to be finished. It was easy to say, “I think you need some more positive space” in order to encourage them to do a little more.

It’s tempting to just jump right into the coloring part of a project, but I was so grateful that I had taken a couple minutes to demonstrate some coloring techniques. Overall, I could see a huge difference in my students taking their time and putting a lot of craftsmanship into their work.

It was very cool to see the wide range of ideas that my students had for this project! I liked that the assignment was concrete, but also open-ended enough that students could take it in their own direction.
