
Fourth grade art students used color schemes to create watercolor washes inspired by Rothko’s artwork.
Supplies:
- Poster board scraps, various sizes
- Color Wheel worksheet
- Colored pencils, one set of 12 for each table
- Wide watercolor brushes (for washes)
- Watercolors
- 9″x 12″ watercolor paper
PowerPoint: Rothko Watercolors

I needed a quick three day project for my fourth graders to fill in one of those weird weeks where the schedule is off, but I have enough time to start a new project. I was also wanting to do something that would keep my antsy fourth graders engaged as we approach the last 2 weeks of school!

I remembered how excited one of my classes was when I demonstrated how to create a wash with watercolors for their Rizzi-inspired wax resist projects. At the end of the year I always have scraps of poster board left over. I decided to use those odds and ends to create a project using washes inspired by Rothko’s paintings.
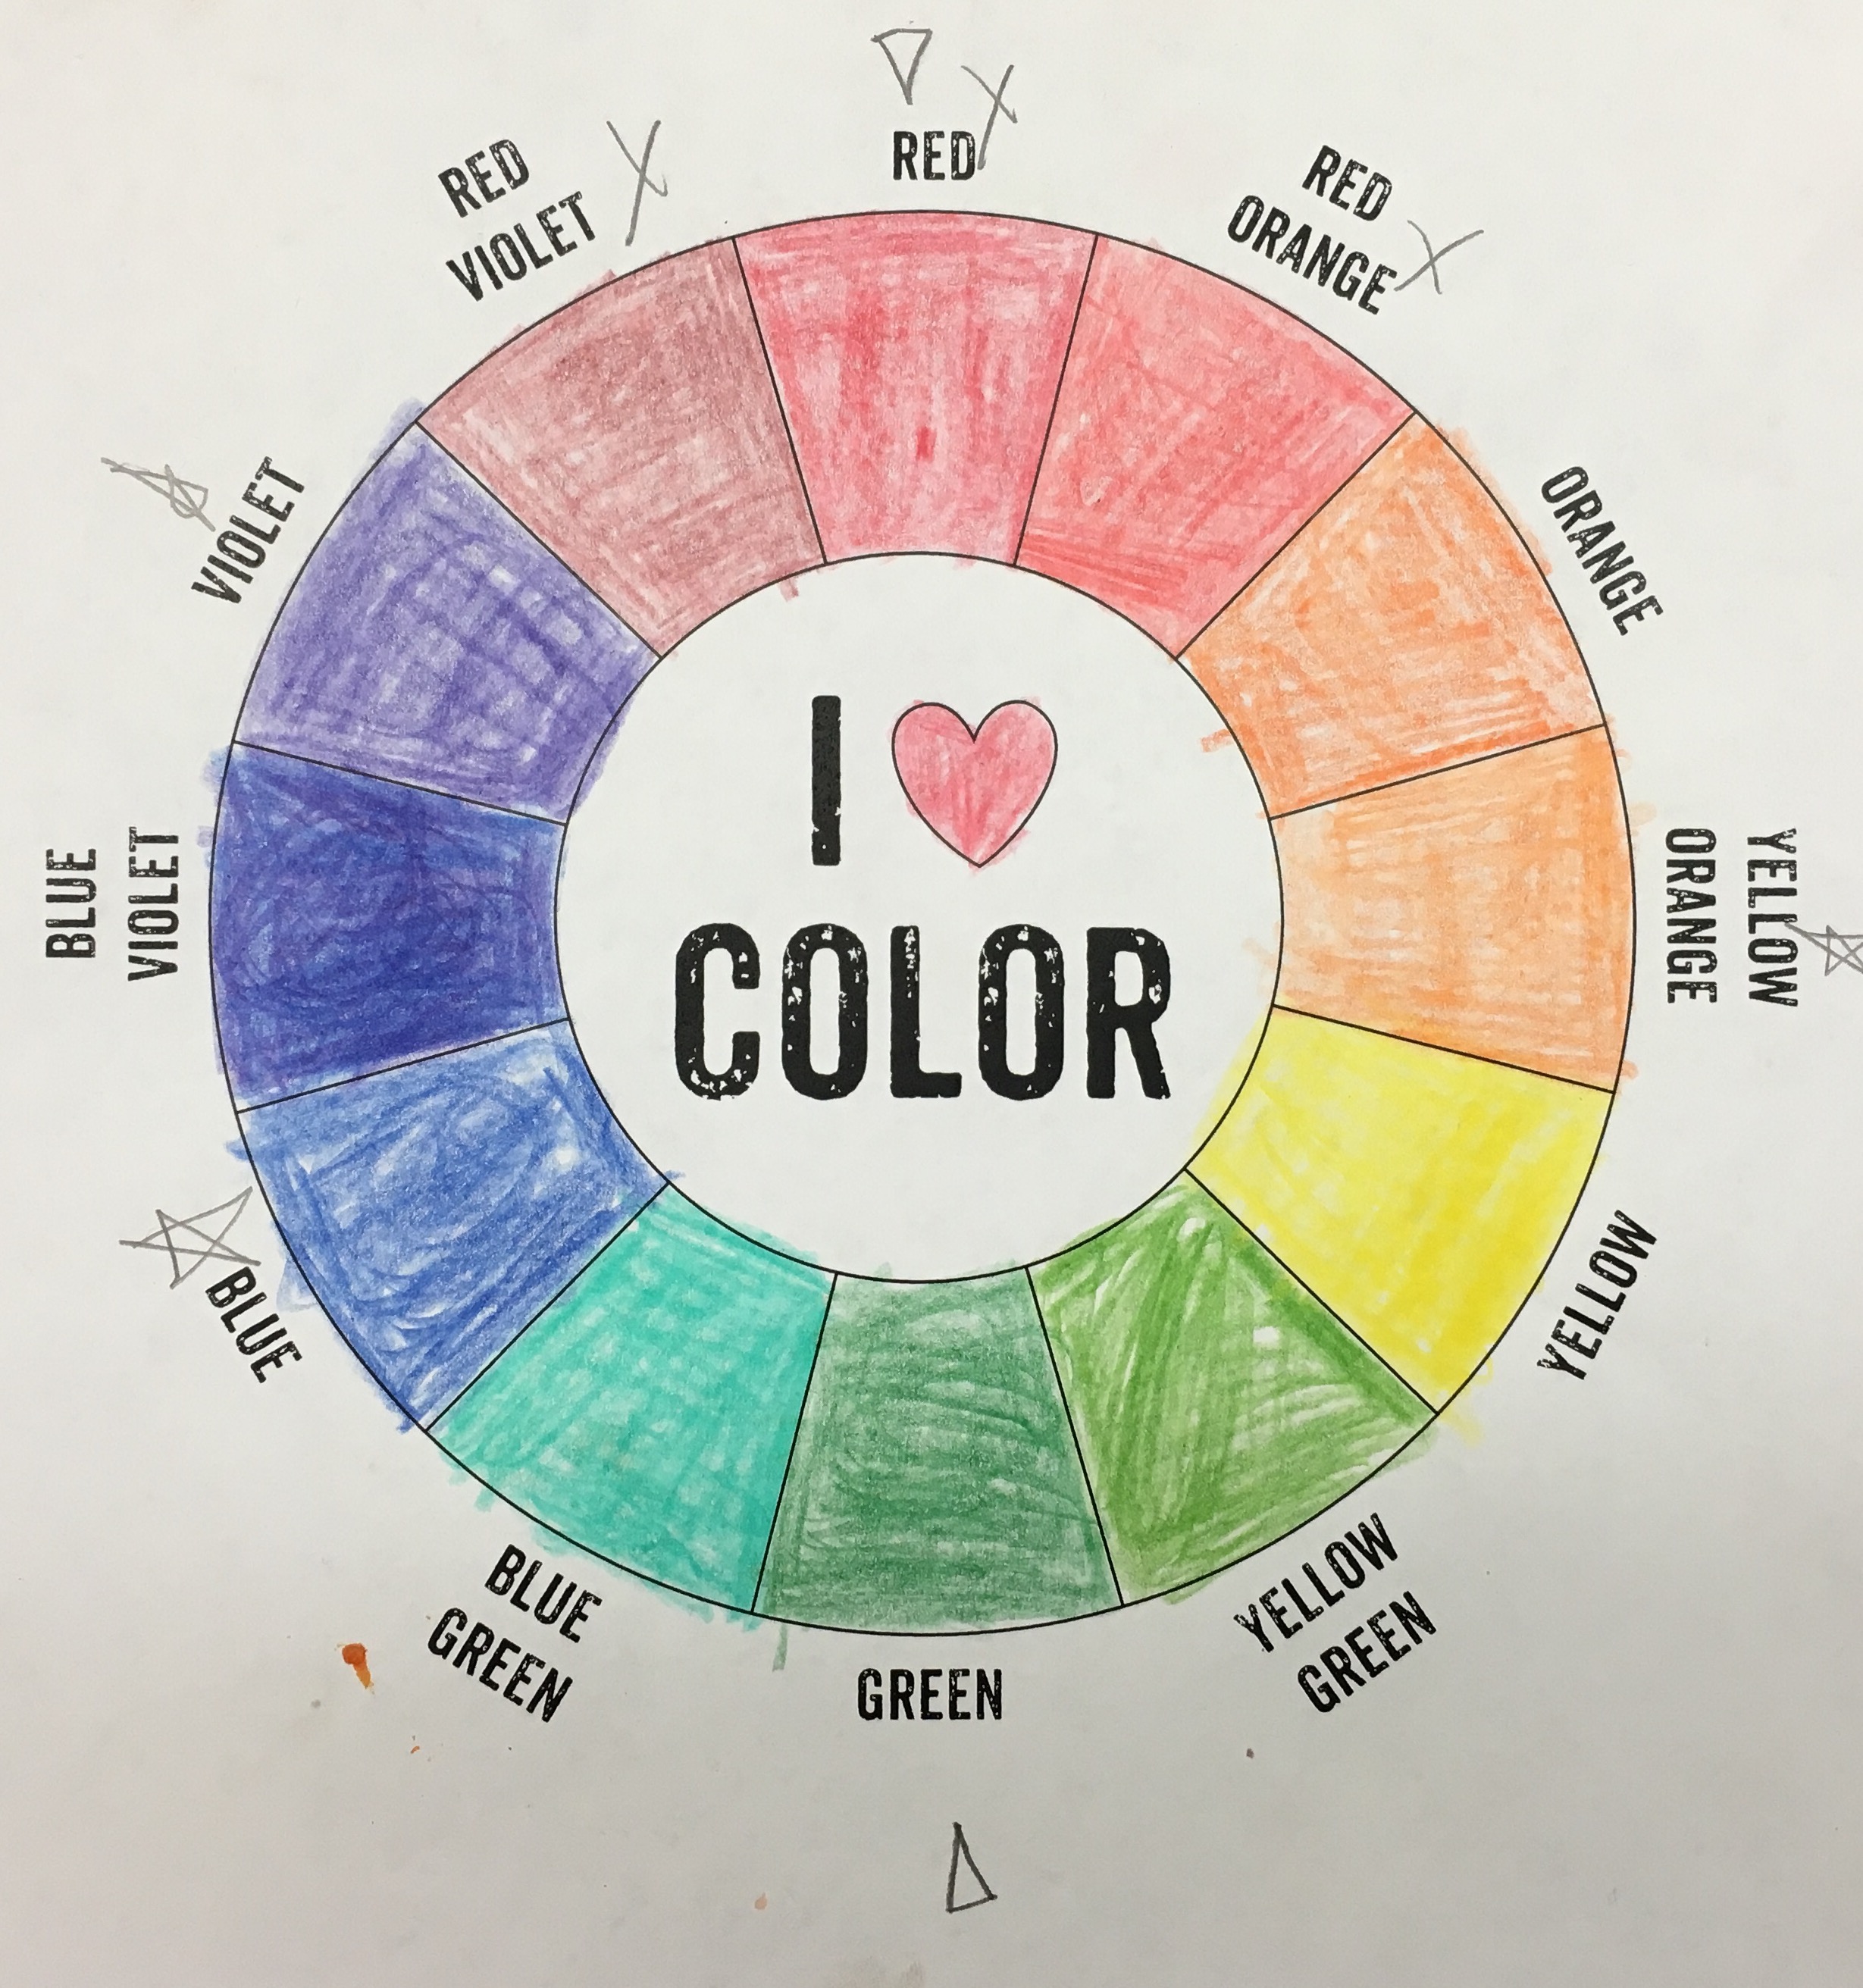
I planned to talk about color theory on the first day. The kids filled in a color wheel, then drew symbols on it to show complementary, analogous and split complementary color schemes. (I downloaded the Color Wheel worksheet from this website.) I had a PowerPoint on the board that showed the symbol key. I also walked individual kids through figuring out the color schemes. The split complementary was especially tricky.

It was a little crazy finding all 12 colors and creating colored pencil sets for each table. I had to substitute some random colors, and I dug deep into my buckets of old pencils looking for multiples of the same color! For blue-violet, I had the kids color purple on top of blue, which worked just fine. The crazy part of this project was that the day I was going to start with the color wheel, there was a huge storm so they had to relocate my classes to the library for the day. I was so happy that the lesson I had planned was perfect for a day outside of the art room!

The second day was a lot of fun! I did a demo of how to create a wash using watercolors. I emphasized the importance of mixing up all of the colors in a tray before starting the painting. Each kid made three small paintings using the three color schemes they had marked on their color wheel. They decided how they wanted to arrange the different colors.

I was pretty loose with this first practice round. If a kid only finished one or two small paintings, they were able to move on to their large painting on the third day. I wanted this project to feel more like a chance to experiment than a list of tasks to complete.

As I was tidying up my supply closet, I discovered a beautiful stack of watercolor paper. It was just enough for me to cut down and give each kiddo a 9″ x 12″ piece. For our third day, they were able to create their own color scheme using any combination of colors they wanted.

It was so interesting to see how different each student’s large painting was. Some stayed pretty close to the color schemes that had used on their smaller painting. And some students tried combinations that were totally different.

I enjoyed the sense of ease and excitement that this project created in my classroom. I love having a project that introduces students to an artist’s work, teaches them a new technique and then sets them free to explore and experiment!
