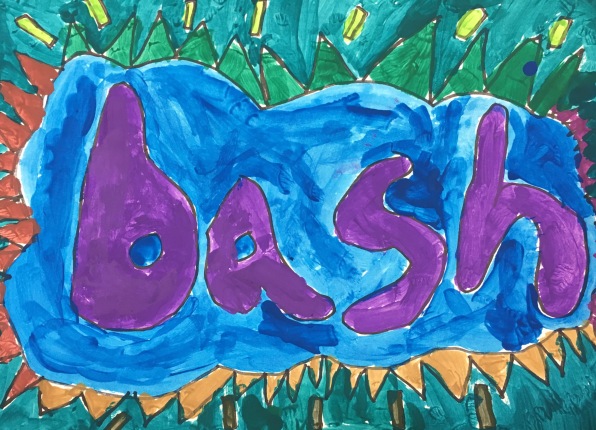
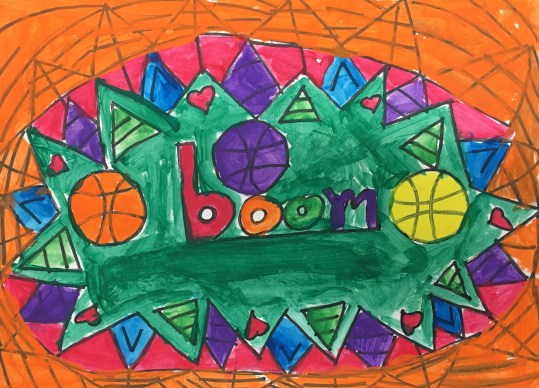
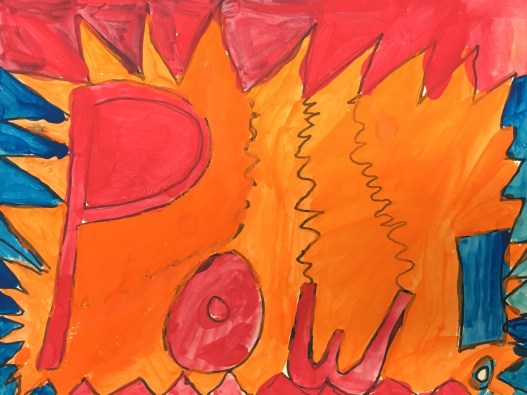
Third grade art students drew and painted onomatopoeias inspired by Lichtenstein’s artwork to create Pop Art Words.
Supplies:
- Poster board, 9″x 12″
- Pencils and erasers
- List of onomatopoeias
- Sharpies
- Tempera paint
- Brushes
- Water cups
PowerPoint: Pop Art Words

I was so surprised by how quiet my classroom got when my first group of 3rd graders started painting their Pop Art project! I had been nervous about classroom management with paint, but setting up routines made this a project that made them go into super-focused mode. I was inspired to create this lesson by a post on There’s a Dragon in my Art Room.

I started out by showing them examples of Lichtenstein’s artwork and talking with them about pop culture and Pop Art. We talked about onomatopoeias and how he used them in his artwork. Before they started sketching, I did a demo of how to draw block and bubble letters. I showed them that if they draw the regular letters very softly, they can trace an outline around the letter and then just erase the inside. I also brainstormed with them about what lines and shapes I could fill the background with that represented the word I had chosen. When they went back to their table, they picked a word from a list of onomatopoeias.

I learned the hard way that the two most important supplies for painting at the elementary school level are poster board and Sharpies. Anything thinner than poster board is going to get dripping wet with paint and cause a huge mess at the drying rack. Tracing over their sketches with Sharpies before they paint helps my students to see their lines throughout the process. And it makes the design of the finished piece stand out.

As usual, it was so much fun to see my students make this project their own. The backgrounds could be realistic or abstract, and they had a lot of fun connecting the background design to their word. The sketching went quickly, so I started off the second day of class by demonstrating our painting procedures. First I walked through the jobs of setting up the table for paint. (Each seat has a job that they are responsible for during set-up and clean-up.) I also show them how the supplies need to be arranged on the table; if the paint and water are easily accessible to everyone, there are much fewer spills. I walked them through the expectations for the Sink Room – only one person at a time, stand on a red line while you wait, only fill the cup up half way. It is an in-depth demonstration, but saying it once at the beginning makes painting go so much smoother for the rest of the week!

Then we finally got to talk about painting! I have observed that most kids will naturally use a paintbrush the way they use a marker, moving it back and forth to fill the space. This makes it hard to control where the paint goes, and they get frustrated that they can’t keep the paint inside the lines. I show them how to load up their brush with paint and then pull it in “one direction” (cue boy band joke!) along the line that they drew. I also show them how to turn their paper so that their hand is always comfortable when they are painting.
Because I have given them so much new information about how to paint, I don’t talk about mixing colors for this project. They have the primary and secondary colors at their table. In almost every class a student will ask me how to get pink, blue-green, or another mixable color. When that happens I explain how to mix colors and give them a mixing tray. Sometimes it catches on like wild-fire and by the end of the period every table has a mixing tray! I love that they are exploring and experimenting at their own pace.
I have several third grade classes back to back, so I emphasize with every class the importance of keeping the paint trays fresh. We talk about rinsing out our brushes and getting fresh water. I also tell them that accidents happen and that if a color does get mixed, they should let me know right away so that I can teach them how to clean it out. Giving them the responsibility of fixing the mess, should it happen, makes them a lot more proactive about keeping the paints clean. Putting away a hundred paintings and passing them back out 4 days in a row is a bit overwhelming, but I have perfected a organizational system that makes it quick and easy!

I love that this project introduces my students to an interesting period of art history and teaches them the basics of painting. The results are so eye-catching! Because some students finish a day earlier than everyone else, I have an engaging sketchbook project that they can work on after. They get to draw and color their own comic. Some of my students get so invested in the comic they create that they go back to those characters and continue the story as a sketchbook project after other assignments.

2 Comments Add yours