
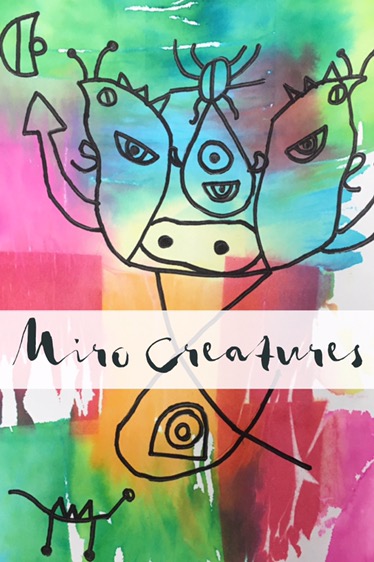
Third grade art students “painted” a background with bleeding tissue paper, then created creatures using lines and shapes from Miro paintings.
Art Lesson Videos: Miro Creatures, Part 1 & Miro Creatures, Part 2
PowerPoint: Miro Creatures
Supplies:
- Poster board – 9″ x 12″
- Bleeding tissue paper, cut into rough squares
- Small spray bottle for each table, on mist setting
- Pencils, erasers, Sharpies
I like to ease my third graders into painting, and bleeding tissue paper is perfect for that. It’s all the excitement of painting with about half the mess. On the first day, they observe two paintings by Miro and draw three shapes that they see. Then I demonstrate how to use the bleeding tissue paper to create a background. I keep the steps posted on the board, so they can remind themselves.

First, they have to spray the whole paper with water. Then, they overlap the tissue paper squares so that they cover the page completely. Next, they spray the paper again so that every square sticks down all the way. I make a big deal about the last step – which is to use a paper towel to soak up any puddles on their paper before they bring it over to the drying rack. After the demo, I really ham it up and have the kids repeat the “Spray Bottle Pledge.” It is incredible how much silliness (and messiness) it prevents in the long run!

I let the poster board dry overnight with the tissue paper still on it. In the morning I take them out and throw away all of the tissue scraps. (Which sounds like a lot of work, but it’s actually fun – a little dose of colorful confetti to start my day!) The kids are usually excited by the results; I learned that I have to prep them the first day by showing them an example of how the background might turn out, so they aren’t frustrated by the whites spaces. If a student is disappointed, I tell them that it looks like tie-dye and that the white helps the colors to pop out.

On the second day, I keep the image of the paintings on the board and I pass out a sheet that has some of the shape and line combinations from the paintings. I talk them through an example of how you could make a creature by putting together some of the shapes. I think aloud about which shapes I could use as the head, the eyes, the body. This also gives me chance to explain that they can change the size and direction of the shapes. And they can use the same shape more than once. They have free reign to use other shapes they observe in the painting that I might not have put on the hand out. They can also choose if they want to make one, big creature that fills the whole page or if they want to draw a lot of smaller creatures.

For most kids, they are able to sketch their creature in pencil, trace it with Sharpie and erase the pencil marks during that second class period. If they finish before class is over, I let them free draw in their sketchbook. Then during the third day of the project, I introduce the “Roll a Miro” game, which keeps them engaged in their sketchbook for the whole class.

This project had definitely become one of my favorites. The kids really enjoy making it and it’s a great way to get them thinking creatively. I like that it scaffolds them into more abstract art-making. They aren’t just copying one of Miro’s paintings, but being inspired by his shapes gives them some building blocks to start with.

One Comment Add yours